Home About Me Freebies My Shop

Sunday, November 24, 2013

Sharing a Giveaway, a Blog Hop, and FREE Graphics

This morning, I wanted to share with you a giveaway, a blog hop, and a secret diamond in the rough I have found to get some amazing FREE clip art to create my TpT products!

http://landofthelittlelearners.blogspot.com.au/

To start off with, the ladies from Down Under are doing a Christmas Blog Hop.  I participated in their Back to School Blog Hop to get an amazing art project to do as a class with my preschoolers.  At each stop, you get a FREEBIE, and I would encourage you to join each of their blogs because they have some creative ideas and products they share all year long!  The first stop is Mrs. Ward's Land of the Little Learners.  Click on the image above to head on over to get started.

http://poultneytania.blogspot.com/2013/11/200-follower-celebrations.html?showComment=1385296241442#c8143603370705815471

http://poultneytania.blogspot.com/2013/11/200-follower-celebrations.html?showComment=1385296241442#c8143603370705815471

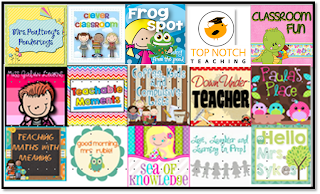
Next, Mrs. Poultney's Ponderings is doing a celebration for reaching 200 followers!  Her rafflecopter asks you to be a follower of almost all of these blogs.  Several of them are participating in the Christmas from Down Under Blog Hop, so if you follow their websites as you are blog hopping, then you'll save time when you take part in her celebration.  All of the blogs above are giving something special away, and Mel at From the Pond is giving away a $10 voucher so you can purchase some graphics!

...Which leads me to the best part!

http://graphicsfromthepond.blogspot.com.au/p/clipart-addicts.html

If you love clipart, whether you use it to add to your classroom newsletter, create labels, or are interested in making TpT products to sell, add this button to your blog!!!  Mel at From the Pond gives away FREE graphics to clip art addicts who are members of her Facebook group and add this button on their sidebar of their blog.  She then uploads them to TpT and sells them for approximately $3.75 each.  I have saved a lot of money, and gotten some really adorable graphics this way!  Click on the link above to find the direction of how to add this button and don't forget to send her a message asking her to add you to the Facebook group!

Happy Thanksgiving everyone, and I hope you take advantage of these fantastic little tidbits!

Friday, November 22, 2013

Stuffed with Thankfulness!

Look at all of the things we did this week in preschool...


{1} The theme this week was, "We are Stuffed with Thankfulness!"  During small group, children chose what color paint they wanted to use for their handprint to create their turkey.  Then, they chose a different color/colors to paint their fingers for the turkey feathers.  They did very well painting their own hands and fingers for this open-ended art project.  They placed their handprints wherever they wanted, and it actually turned out better if they made the turkey body wider with more than one handprint.  Finally, they glued on the eyes, nose, waddle, beak, and feet.


{2}  During Centers, children got the opportunity to strut like a turkey during our Turkey Trot.  We painted one of their feet, and then put their footprint on a white piece of paper to use later.  Then, they strut across the paper, flapping their wings, and gobbling like a turkey.  And again, after their footprint was dry, they created a turkey using feathers, eyes, a beak, waddle, and feet.
 
 
{3} For another small group (we do one small group a day, so they go to all of the small groups by the end of the week), students drew a picture of a turkey on a paper, and they named the turkey.  We wrote the name of the turkey on the bag (for example, Mr. Tom or Tom the Turkey), and they had to think of things that started with the same beginning sound.  They drew the picture of the animal, food, or object on a small white piece of paper (i.e. T says /t/ = train, tooth, turtle), and put the picture in the bag.  Then, children shared the name of their turkey and what they were able to come up with to put in their bag that started with each sound.
 
 
{4} One of the things we have been working on is making patterns.  We have used linking cubes, gears & plates, letters, buttons, and objects we use to sort.  Earlier in the week, I was working on making patterns out of linking cubes with one of my students, who began making a tall tower out of them.  He stood the tower up on the table, then let it fall off onto the floor, and it broke apart.  Though he wasn't making a pattern out of the blocks, he was engaged and discovered something new he could do with them. 
 
The following day, I noticed the same child was making a tower out of the linking cubes, and it was longer than the table.  Seizing a teaching opportunity, we attempted to stand the tower up and it fell apart.  This started a frenzy of children helping us to build the tower taller and taller until it almost reached the ceiling.  Then, we all counted to three and let go of the tower, watching it fall to the floor.  The linking cubes being made out of plastic, some fell apart, and some of them bounced!!!  This was an activity that started with a math concept and turned into an activity about discovery, and working as a team to make something together.  I was amazed at how well all of the students worked together, and the critical thinking that was taking place to solve problems and create solutions during this activity.  :)


{5} Previously, I posted about our color songs we sing each week, which you can view here.  We learn a new song each week, along with the sign language for the color word.  I print out the words to each song, along with real pictures of the items mentioned in the song (i.e. a fire truck and stop sign for red).  If you would like the words for each color song, click on each color below to access the song on YouTube:
 
Green
 
I was unable to find the green song on YouTube, as it looks like the video has been deleted.  So, I provided you with the words!
 
To the tune of: Row, Row, Row Your Boat
 
G - r - e - e - n
G - r - e - e - n
I know how to spell green
G - r - e - e - n
Caterpillars are green
And grasshoppers too.
I know how to spell green
G - r - e - e - n
 
This week, I put all of the other color posters in the Book Corner for students to practice reading with a pointer.  The children were interested in reading the posters, but they were too tall to fit on the Big Book easel, and children were having trouble standing them up so they could read the words.  Today, we placed them along the wall to encourage them to continue practicing tracking print, and to gain more confidence that they are readers!
 
http://doodlebugsteaching.blogspot.com/2013/11/five-for-friday-november-22.html
 
Be sure to check out all of the other blogs that participate in Doodle Bugs' Five for Friday by clicking on the image above!
 

Saturday, November 16, 2013

Five for Friday - Opening Day

http://doodlebugsteaching.blogspot.com/2013/11/five-for-friday-linky-party-november.html


Well, it's time for Five for Friday and I haven't posted in a while.  I know it's Saturday, but I was stuck to the couch yesterday with the stomach flu!  UGH!!!  After lots of sleep, I feel much better, so hopefully I'm over that!

I've been quite busy getting everything set up for my evaluation.  I find out Monday how it went, but she sounded quite positive when I spoke to her afterwards.  It's quite nerve-wracking having someone in your classroom all morning long, writing down every detail about your classroom and taking pictures. 

Now that that's finally over, I can make my way back to the blogging world and hopefully start posting some of the things we've been doing in my classroom!

 
{1} Since I'm in a new classroom and a new grade this year, I've been working on ways to get organized and to make the classroom my own.  I took pictures of some of the items in my classroom this week to make labels.  Instead of putting items out on the tables for my students to use during Centers, they pull the items they want to use off of the shelf, and this helps them to know where to put them back.  This way, they are more likely to stay engaged in the activity for longer, and are willing to try out more activities because they have choice.  They don't get full reign of the classroom.  4-5 choices (at most!) is all they need, and it can be different activities that practice the same skill.
 
 
{2} During our Morning Meeting, I choose a Teacher Assistant to help me with calendar, the weather, and draw the Morning Message on the whiteboard.  At the beginning of the year, I started by drawing a person, talking about all of the body parts a person has.  Some days, we will make a list for our Morning Message, or I taught them how to draw a cat and a pumpkin, and we discussed how they are similar to drawing a person because they all have similar shapes.  After my Teacher Assistant draws a person (of their choice), they find their name strip in the Writing Center and write that person's name.
 
 
{3} I encourage students to take what they have learned from our Morning Meeting and use the information to practice during Centers.  I am fortunate to have another whiteboard in my classroom that is just for my students so they can practice writing skills.  This student wrote the letter "A" and said "It's in my name," and then he drew his mom.  He told me, "This is my mom.  Her eye hurts."  The conversations I have with students during this time really helps me to understand their thinking, and to help scaffold their skills to enhance their learning.


{4} This was my favorite activity this week, and also the one I was most nervous about, but pleasantly surprised!  The preschool teacher next door brought in golf tees and hammers so students could pound the golf tees into the pumpkins we had left over after our pumpkin discovery activity from the week before.  My students were so careful during this activity, working together, with one student holding the golf tee, and the other using the hammer.  And they were so patient to wait their turn!
 
{5} To conclude our pumpkin unit, students glued pumpkin seeds and yarn to a foam pumpkin cutout for an art project.  After it was dry, they cut out an orange construction paper pumpkin (that we traced from the foam pumpkin) and we stapled it on top.  Then, we wrote "This is what my pumpkin looks like on the inside."  I got the idea for this project from a pin I found on Pinterest.
 
Thanks for reading and have a blessed weekend!